How many times have you gone through your checklists, head bobbing up and down, finger following along on the checklist so you don’t miss something? What was once paper is now part of our tablet aviation apps. But it still requires some poking and tracking to ensure we don’t miss something. Cockpit Resource Management (CRM) stresses the challenge response approach to using checklists. But for a single pilot, or with non-pilot right seaters, you may end up doing it solo. I thought about how a computer based copilot could help with running the checklists. This can be an easy augmentation with a set of mp3 files with each item read and controlled by a push button on the yoke. There’s no need to look anyplace but at the item being checked and then on to the next item with the push of a button. No losing your place or fumbling around for the right place on the checklist.
The design is nothing more than a controllable mp3 player. That was when great aha invention moments are sometimes followed by oh, someone already did this. About half way through my project, I found numerous patents, one by Google, and one aviation product by Heads Up Technologies that does this same task, albeit at a price that is not in range of most GA pilots. Consider this a research work in progress with an implementation of the idea for hobbyists.
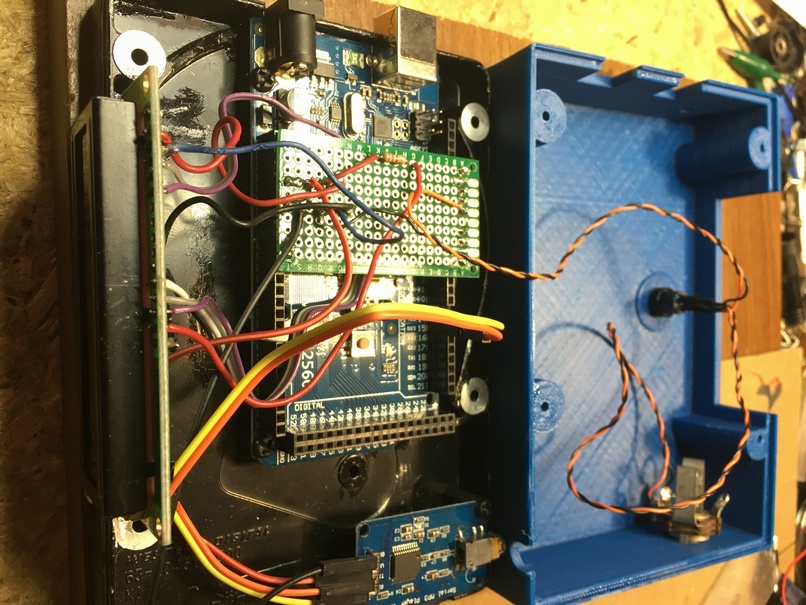
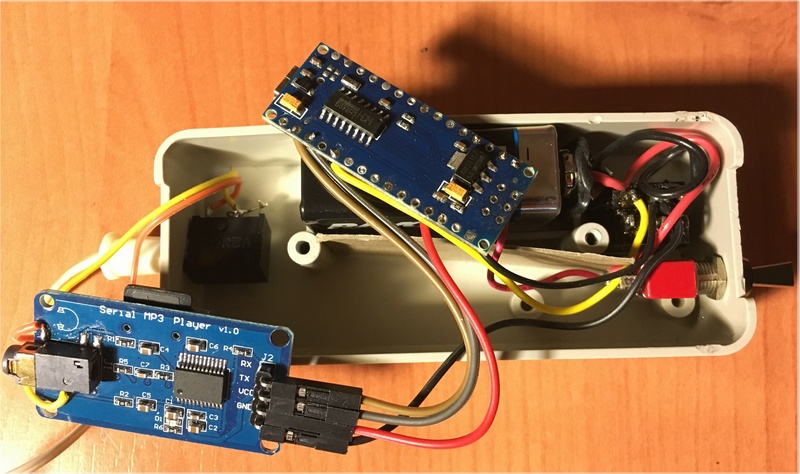
The basic items you’ll need for this project are an Arduino, mp3 interface and display (optional). The Mega2560 was chosen since the code is too large for an Uno or other Arduinio’s. The LCD isn't needed if you experiment with the audio only version.
I provided a functional Arduino sketch that gives you a place to start for your project. The Arduino development software is free from the Arduino site. The mp3 files were produced using Balabolka. You may have other programs you prefer or you can record someone’s voice. Here’s the software I used:
Checklist names and checklist items are embedded in the Arduino code and displayed on the LCD. The vocal counterparts in the mp3 files stored on the microSD card are simultaneously played. In making the mp3 files, I cut and pasted the text from the Arduino sketch into the text to speech program and saved the mp3 file with a sequential file name.
The Catalex mp3 player is very fussy about how files are assembled on the card. Each file must be named starting with 3 digits (e.g., 001.mp3, 002.mp3). Anything extra text may be added to the filename (e.g., 001-Before Starting Engine.mp3). The best method for organizing is to put each set of checklist item mp3 files in a separate directory. Directories are numbered with two digits starting at 01. I used directory /98 for information and error messages, and /99 for the checklist name mp3 files. It’s imperative that you match the sequence of mp3 files to the checklist names and items in the Arduino code. This table provides a method of tracking your checklists and checklist items.
| Checklist Names in /99 | ||||||
|---|---|---|---|---|---|---|
| /01-Before Starting Engine | /02-Starting Engine | /03-Instruments | /04-Engine Run-up | /05-Pre-Takeoff | /06-Before Landing | |
| Checklist Items | 001- | |||||
| 002- | ||||||
| 003- | ||||||
| 004- | ||||||
Information and error messages in directory /98:
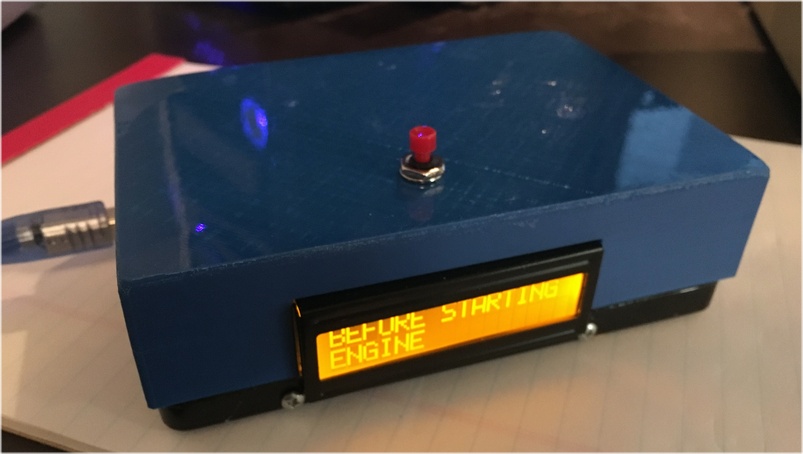
Upon power up, the unit will display the version and you will hear “Vcheck Ready” in the audio. The pushbutton has three functions:
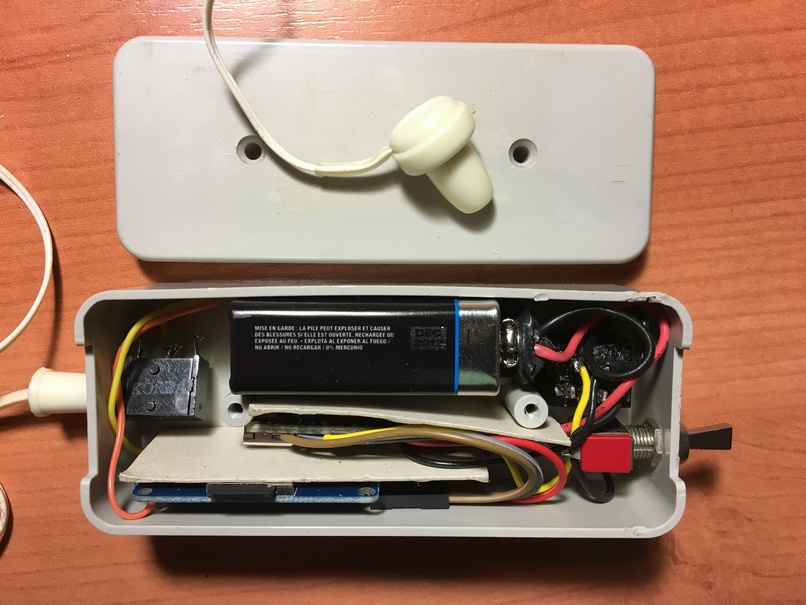
There are a lot of research areas in implementing this concept. One of them is the approach to advancing the checklist. Voice advance to next item could be implemented. In my design, I also included a push button on the box in case I didn’t want to use the yoke mounted PTT switch. Bluetooth transmission of audio to compatible headsets is another possible solution. If you don't use the display, an Arduino nano could be used and housed with a 9v battery in a small handheld box connected to your intercom.